4.9 KiB
Development
Setup
Using Pip
1. Install
# Get Khoj Code
git clone https://github.com/khoj-ai/khoj && cd khoj

# Create, Activate Virtual Environment
python3 -m venv .venv && source .venv/bin/activate

# Install Khoj for Development
pip install -e .[dev]

# For MacOS or zsh users run this
pip install -e .'[dev]'
2. Run
- Start Khoj
khoj -vv - Configure Khoj
- Via the Settings UI: Add files, directories to index the Khoj settings UI once Khoj has started up. Once you've saved all your settings, click
Configure. - Manually:
- Copy the
config/khoj_sample.ymlto~/.khoj/khoj.yml - Set
input-filesorinput-filterin each relevantcontent-typesection of~/.khoj/khoj.yml- Set
input-directoriesfield inimagecontent-typesection
- Set
- Delete
content-typeandprocessorsub-section(s) irrelevant for your use-case - Restart khoj
- Copy the
- Via the Settings UI: Add files, directories to index the Khoj settings UI once Khoj has started up. Once you've saved all your settings, click
Note: Wait after configuration for khoj to Load ML model, generate embeddings and expose API to query notes, images, documents etc specified in config YAML
Using Docker
1. Clone
git clone https://github.com/khoj-ai/khoj && cd khoj
2. Configure
- Required: Update docker-compose.yml to mount your images, (org-mode or markdown) notes, PDFs and Github repositories
- Optional: Edit application configuration in khoj_docker.yml
3. Run
docker-compose up -d
Note: The first run will take time. Let it run, it's mostly not hung, just generating embeddings
4. Upgrade
docker-compose build --pull
Validate
Before Making Changes
- Install Git Hooks for Validation
pre-commit install -t pre-push -t pre-commit- This ensures standard code formatting fixes and other checks run automatically on every commit and push
- Note 1: If pre-commit didn't already get installed, install it via
pip install pre-commit - Note 2: To run the pre-commit changes manually, use
pre-commit run --hook-stage manual --allbefore creating PR
Before Creating PR
-
Run Tests. If you get an error complaining about a missing
fast_tokenizer_file, follow the solution in this Github issue.pytest -
Run MyPy to check types
mypy --config-file pyproject.toml
After Creating PR
-
Automated validation workflows run for every PR.
Ensure any issues seen by them our fixed
-
Test the python packge created for a PR
- Download and extract the zipped
.whlartifact generated from the pypi workflow run for the PR. - Install (in your virtualenv) with
pip install /path/to/download*.whl> - Start and use the application to see if it works fine
- Download and extract the zipped
Create Khoj Release
Follow the steps below to release Khoj. This will create a stable release of Khoj on Pypi, Melpa and Obsidian. It will also create desktop apps of Khoj and attach them to the latest release.
- Create and tag release commit by running the bump_version script. The release commit sets version number in required metadata files.
./scripts/bump_version.sh -c "<release_version>"
- Push commit and then the tag to trigger the release workflow to create Release with auto generated release notes.
git push origin master  # push release commit to khoj repository
git push origin <release_version>  # push release tag to khoj repository
- [Optional] Update the Release Notes to highlight new features, fixes and updates
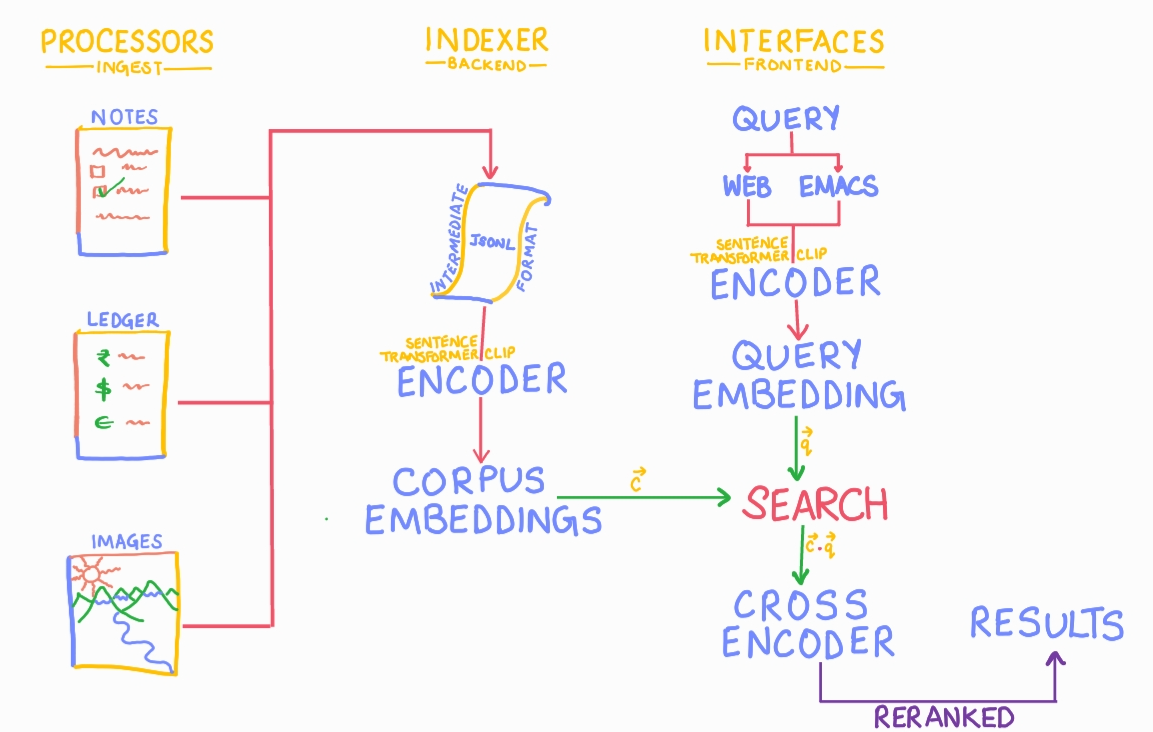
Architecture
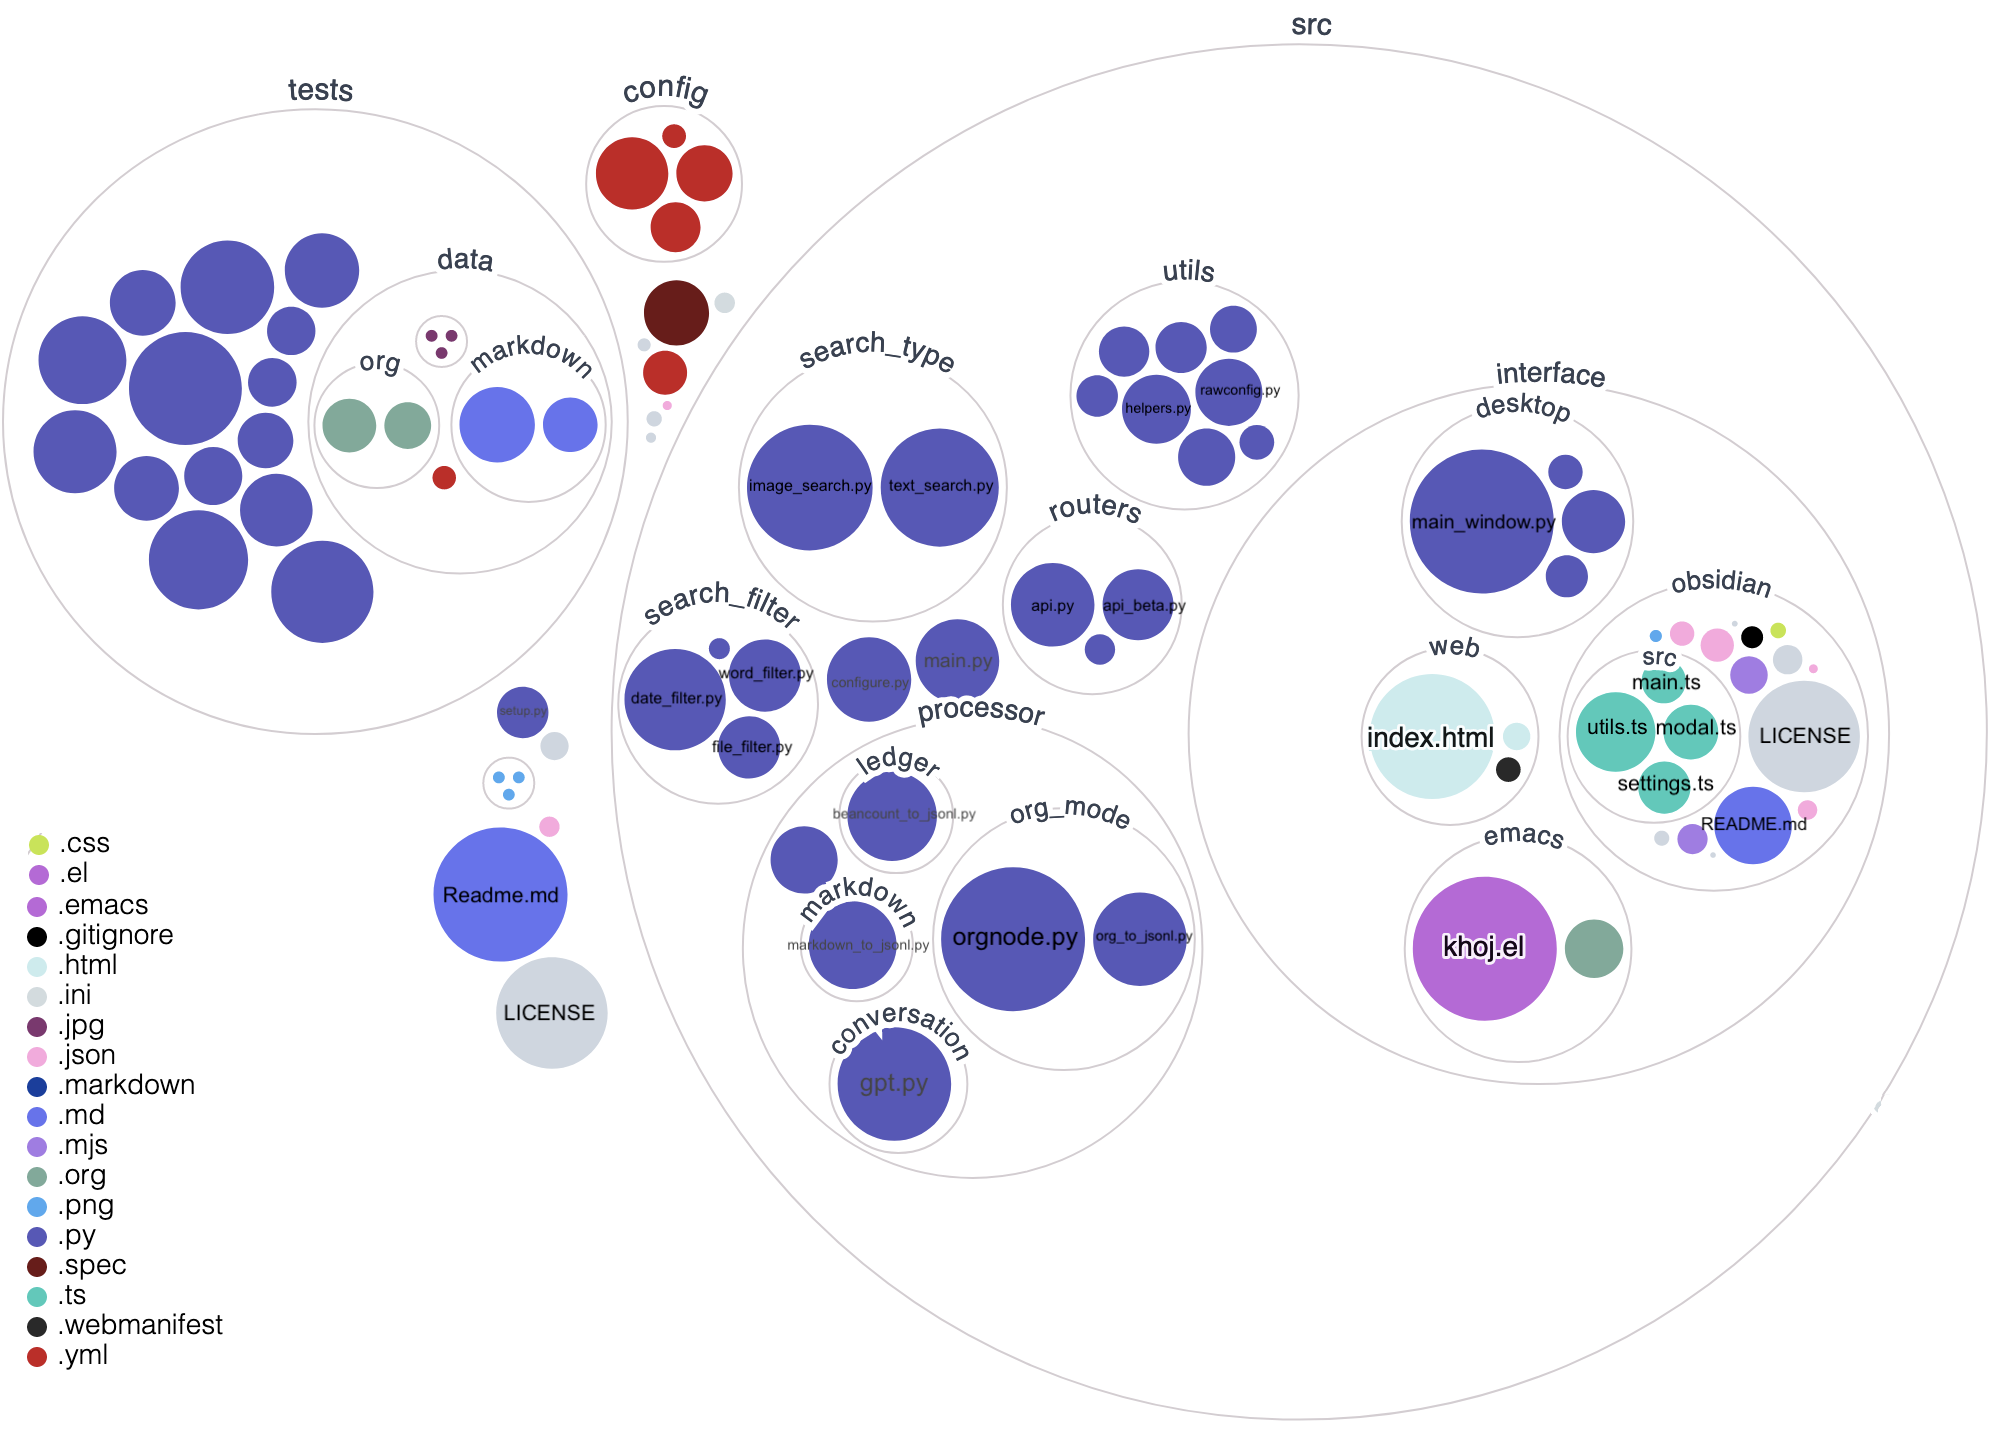
Visualize Codebase
Visualize Khoj Obsidian Plugin Codebase
Khoj Obsidian Plugin Implementation
The plugin implements the following functionality to search your notes with Khoj:
- Open the Khoj search modal via left ribbon icon or the Khoj: Search command
- Render results as Markdown preview to improve readability
- Configure Khoj via the plugin setting tab on the settings page
- Set Obsidian Vault to Index with Khoj. Defaults to all markdown, PDF files in current Vault
- Set URL of Khoj backend
- Set Number of Search Results to show in Search Modal
- Allow reranking of result to improve search quality
- Allow Finding notes similar to current note being viewed


